Minecraft, a beloved sandbox game, offers endless possibilities for creativity and exploration. While playing solo can be exciting, hosting your own server elevates the experience to another level. It allows you to connect with friends, set your own rules, and even invite players from around the world to join your custom world. In this guide, we’ll walk you through the steps of setting up your own Minecraft server, even if you’re a complete novice.
Why Create a Minecraft Server?
The thrill of exploring a Minecraft world grows exponentially when shared with others. A personal server gives you control over your gameplay environment—you decide the rules, game modes, and customizations. Hosting a server also encourages teamwork, fosters creativity, and builds a sense of community among friends and other players.
That said, creating a Minecraft server has its pros and cons:
Advantages
- Complete Control: You determine game settings, mods, and rules.
- Personalized Experience: Customize worlds and gameplay for unique experiences.
- Community Building: Play with friends or open your server to global players.
Disadvantages
- Performance Limits: Free hosting services often come with restrictions on RAM and player slots.
- Technical Knowledge: Beginners may face a learning curve during the setup process.
- Time-Consuming Maintenance: Regular updates and server management can be time-intensive.
Despite these challenges, the rewards of hosting your own server far outweigh the difficulties.
How to Create a Minecraft Server for Beginners
In this guide, we’ll focus on using Aternos, a popular and free platform for creating Minecraft servers. Aternos is beginner-friendly, requires no downloads, and allows you to host servers for both Java and Bedrock editions.
Step 1: Registering on Aternos
- Visit Aternos: Go to Aternos and access the homepage.
- Create an Account: Click “Sign up” and provide a username, a secure password, and accept the terms.
- Captcha Verification: Complete the verification process to confirm you’re not a robot.
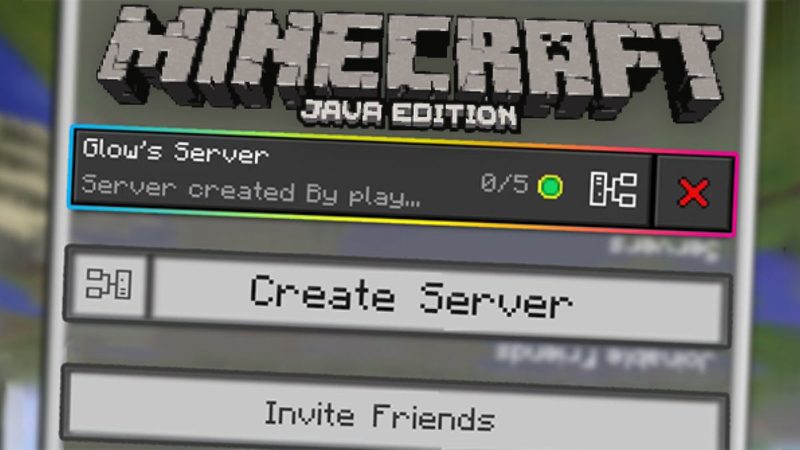
Step 2: Creating Your Server
- Log in: Once registered, log in to your Aternos account.
- Start Setup: Click on “Get yours now” from the dashboard and choose “Create a server.”
- Select Minecraft Edition: Decide between the Java Edition (for PC players) or Bedrock Edition (for cross-platform compatibility). Make sure to choose the edition you and your friends use.
- Name Your Server: Customize your server name and add an optional description.
Step 3: Customizing the Server
- Game Settings: Access the “Options” tab to configure game rules, difficulty, and world type (Survival, Creative, Hardcore).
- Plugins and Mods: If desired, explore the “Mods” or “Plugins” section to install additional features. Be mindful of compatibility with your server’s Minecraft version.
- Whitelist and Security: Enable a whitelist to control who can join your server, enhancing privacy and safety.
Step 4: Starting the Server
- Launch Your Server: Click “Start” on the dashboard. You’ll need to agree to the EULA (End User License Agreement).
- Wait for Activation: The server may take a few minutes to initialize. Aternos provides real-time updates on the server status.
- Save Connection Details: Note your server’s IP address and port, as these are required to connect.
Step 5: Connecting to Your Server
- Open Minecraft: Launch the game on your platform.
- Add Server: Navigate to the “Multiplayer” section, then click “Add Server.”
- Enter Server Details: Input the IP address and port provided by Aternos. Name the server for easy identification.
- Join the Server: Once added, select your server from the list and start playing!
Tips for Maintaining Your Minecraft Server
- Monitor Performance: Regularly check for server lags or crashes. Adjust settings if needed.
- Backup Your World: Use Aternos’ backup feature to save your progress and avoid data loss.
- Stay Updated: Keep the server version aligned with Minecraft updates to ensure compatibility.
Conclusion
Creating a Minecraft server is a rewarding experience that amplifies the fun and creativity of the game. Platforms like Aternos make the process accessible for beginners, offering a free, user-friendly way to set up servers for both Java and Bedrock editions. While there are limitations, such as performance constraints and maintenance demands, the ability to build and play with friends in a customized world is well worth it.
Whether you’re new to Minecraft or a seasoned player, hosting your own server opens up endless possibilities for adventure, collaboration, and innovation. Ready to get started? Follow these steps, and let the crafting and building begin!
Leave a Comment